
.JPG)
A Bluetooth module can add a lot of possibilities to a mobile robot while being relatively cheap and widely used. To control it you need a second microcontroller or a device like a smartphone with integrated Bluetooth which are complicated to set up to work with an Arduino
There
already are some solutions in the Google play store but I could not find a
decent remote that fit to my recent project. Most of them only have 4 buttons
and a control delay of a few seconds. So I decided to create my own app.
The only
real programming experience I had so far was in C and Arduino. Normally Java is
required for android apps but learning it was not in my time frame. I
remembered that last year I used Processing to write a small applet for an
assignment. Processing is a programming language initiated in 2001 at the MIT.
It has its own IDE, just like Arduino which is a descendant of Processing.
Their user interface still look nearly identical. But while Arduino is based on
C++ Processing sketches are translated into pure Java. You can easily create
software for Windows, Linux, Mac and even Android using a syntax very similar
to Arduino.
On my list
of expectations for an app were: Multitouch, Two-way communication, decent
speed and a nice UI. Multitouch turned out to be the biggest problem, after
hours of research I found a working example program on the internet:
There is
also a nice tutorial on implementing Bluetooth and making it work with Arduino:
I put those
two together and added the UI which uses the ControlP5 library for some parts.
Making it really work took a lot of time, especially the communication part.
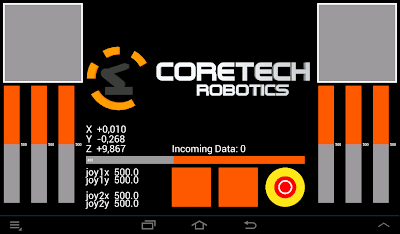

The app was
meant for my 7” tablet, so the UI is only displayed correctly on a device with
the exact same screen resolution. Last weekend I made some changes to the code
to make it universally usable. You should be able to install and run the app
without problems if you have a Bluetooth phone or tablet. A screen resolution of around 1024*700 is recommended, I could not get rid of some resizing problems yet.
Disclaimer: Use the provided software at your own risk.
Disclaimer: Use the provided software at your own risk.
Detailed Installation Instructions:
1. Download the CTRControl.apk-file and put it
onto the devices SD or internal storage:
CTRControl.apk
CTRControl.apk
2. As this is not an official
Google-approved app you need to turn on “unknown
sources” in the Android developer settings tab
3. Open the .apk-file with any file
explorer and click on “install”
4. Now the Icon should appear in the
app menu.
5. Before you start the app make sure
the Arduino’s Bluetooth module is paired with the Android device. (It should be
listed in the Bluetooth settings)
6. If you start the app it will prompt
you to choose a connection. If there is a LED on the module it should light up
after the connection is established.
On the side
of the Arduino you need to read the data and write it to variables. I already
created an example sketch which lets you control servos with the remote:
BT_example.zip
BT_example.zip
The “protocol” works like this:
Every
slider has a range of 0 to 999. To distinguish them there is a letter in front
of every transmitted value (e.g. a034 or c789). The data for the two Multitouch
joysticks is transmitted all the time. Only if a slider value changes it will
be transmitted too. The buttons work in
the same way, while 999 means true and 000 means false. The emergency off only
transmits 999 to make sure that a double press doesn’t switch the system back
on.
The whole
code is not optimized and this is for sure not the most elegant way. I stopped
at the point where it was functional, and the control delay is acceptable. It
should even be possible to control a Quadrocopter. The entire app is
surprisingly fast, it loads in an instant and takes not much more than half a
MB of memory.
Plans for the future:
· Multitouch
for all sliders and buttons
· Send accelerometer data for tilt control
· Real
two way communication
Integration
in the Google Play Store


